How to Install a Ceiling Fan
Important Notice: Our web hosting provider recently started charging us for additional visits, which was unexpected. In response, we're seeking donations. Depending on the situation, we may explore different monetization options for our Community and Expert Contributors. It's crucial to provide more returns for their expertise and offer more Expert Validated Answers or AI Validated Answers. Learn more about our hosting issue here.

How to Install a Ceiling Fan
You must be logged in to post a comment.
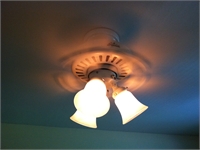
Ceiling fans provide welcome respite from warmer temperatures in warmer times of the year. Additionally, they offer increased air circulation in multi-story homes and in places that tend to remain stuffy. The process of how to install a ceiling fan on your own is not much more involved than putting up a new light, but there are additional steps involved to ensure success.
Power:
Prior to removing an old fixture or installing your new fan, be sure to turn off power to the room or circuit. This is done by heading to the breaker panel in your basement or lower level and locating the circuit breaker assigned to the space. Electricians typically label each breaker to the side. Verify that power is off at the fixture’s location by using a tool that indicates the presence of current. These pen-shaped devices beep and light up when power is present. You may want to use a helper to test the wires while you flip breakers off at the panel if they remain unlabeled.
Color Code Verification:
Different manufacturers of ceiling fans often have slightly different wiring color codes for the light and the fan assembly. Verify which is which in the fan’s instruction manual. Mis-wiring generally will not damage the fan or light (if present) but will result in undesired operation.
Wiring:
Pull off the pre-stripped insulation from the ceiling fan’s wires. Twist the individual strands to prevent frayed wire strands from causing a short. Slide the wires through the hole at the top of the fan’s mounting bracket. Match the colors protruding from the ceiling to the appropriate colors on the fan, following the manufacturer’s directions. Place each wire pairing parallel to one another. Twist an orange or yellow wire nut over the bare wires on each pair until it is hand-tight. Over-tightening may result in one or both of the wires shearing. Repeat for each pairing as directed in the installation portion of your ceiling fan manual.
Mounting the Fan:
Using the supplied machine screws, affix the mounting bracket to the two threaded holes on the junction box installed in the ceiling. Any previous light or fan location will most likely have this box pre-installed when the home was built. If the fan is mounted on an angled ceiling, use the downrod adapter supplied with the fan. This allows the fan to hang parallel with the floor, even if the ceiling is angled. Slide the finial cap over the mounting bracket. This hides the bracket and some of the wiring after the fan is installed. Attach the fan’s motor body housing to the holes on the mounting bracket using the shorter supplied screws. Ensure that no wires are pinched during this process.
Test and Enjoy:
Turn the breaker back on controlling the power to the fan’s installed space. Test the fan by pulling on the chain attached to the main motor body. If nothing happens double-check the wiring. A common error is mismatching the white and black wires from the ceiling. Enjoy the increased airflow and cooling offered by installing a new ceiling fan in your home!